What Is a Twitch Clip?
A Twitch clip is a short video segment captured from a live stream or VOD (Video on Demand). Think of it as a highlight reel moment that you or your viewers can grab in real time. Whether it's a clutch play, a hilarious fail, or a reaction that deserves to live forever, clips let you bottle those moments and share them with the world.
Clips live on Twitch as standalone content with their own shareable URL. They show up on a streamer's channel page, can be sorted by popularity, and are searchable across the platform. Over 124 million clips have been created on Twitch, racking up more than 1.7 billion views collectively. That's a lot of clippable moments.
But here's what most guides won't tell you: a Twitch clip is not just a fun feature. It's raw content waiting to be turned into growth fuel. The streamers who understand this are the ones showing up on TikTok, YouTube Shorts, and Instagram Reels consistently, and that consistency is what drives discovery.
How Long Can a Twitch Clip Be?
Twitch clips can be anywhere from 5 to 60 seconds long. When you create a clip, Twitch captures up to 90 seconds of recent footage and lets you trim it down to exactly the moment you want. The default capture window is 30 seconds, but you can drag the selection handles to include more or less of the broadcast.
For social media repurposing, shorter clips tend to perform better. Videos under 60 seconds average a 50% engagement rate across platforms, so keeping your clips tight and punchy is a smart move.
Who Can Create Clips on Your Channel?
By default, any viewer can create clips on your Twitch channel. This is actually one of the most powerful things about clips: your community does the content creation for you. However, as a streamer, you have full control over this.
In your Creator Dashboard settings, you can restrict clip creation to subscribers only or disable clips entirely. Most growth-minded streamers keep clips open to everyone, because the more people clipping your best moments, the more content you have to work with.
How to Make a Clip on Twitch (Desktop)
Learning how to clip on Twitch is straightforward once you know where to look. There are two main methods on desktop, and both take just a few seconds.
Using the Clip Button
- Watch any live stream or VOD on Twitch in your browser.
- Hover over the video player to reveal the controls.
- Click the clip icon (it looks like a small clapperboard/film slate) in the bottom-right area of the player.
- A new window opens with the clip creation editor.
- Drag the blue handles to select the portion you want (5 to 60 seconds).
- Add a title that describes the moment.
- Click "Publish" and your clip is live.
That's it. Your clip now has its own URL and appears in the channel's clip library.
Keyboard Shortcut (Alt+X / Option+X)
If you want to clip on Twitch even faster, use the keyboard shortcut. Press Alt+X on Windows or Option+X on Mac while watching any stream. This instantly opens the clip editor with the last 30 seconds of footage pre-selected. From there, trim and title it just like you would with the clip button.
This shortcut is especially useful during fast-paced streams where you need to capture the moment before it passes.
Editing Your Clip Length and Title
The Twitch clip editor gives you a simple timeline with two draggable handles. Slide them to define exactly where your clip starts and ends. You'll see a preview play in real time as you adjust.
A few tips for better clips:
- Start a second or two before the moment to give viewers context.
- End quickly after the peak moment to keep things tight.
- Write a descriptive title that makes people want to click. "Insane 1v4 clutch" works better than "clip 47" for discoverability.
How to Clip on Twitch Mobile
Clipping on mobile is nearly as simple as desktop, and it's a great option when you're watching streams on the go. Here's how to make clips on Twitch from your phone or tablet.
Clipping on the Twitch App (iOS and Android)
- Open the Twitch app and navigate to a live stream or VOD.
- Tap the screen to reveal the playback controls.
- Tap the clip icon (clapperboard icon) in the control bar.
- The clip editor opens with the last 30 seconds of footage selected.
- Drag the handles to trim your clip to the perfect length.
- Add a title and tap "Publish."
The mobile clip editor works the same way as desktop. The only difference is you're working with a smaller screen, so precision trimming takes a bit more patience.
Editing and Trimming Mobile Clips
The mobile editor gives you the same 5-to-60-second range as desktop. One thing to note: the mobile app sometimes loads a slightly shorter capture window depending on your connection speed. If you don't see enough footage, try again on a more stable connection.
Once published, your mobile clip is identical to a desktop clip. Same URL, same quality, same visibility.
How to Clip from Twitch VODs and Past Broadcasts
You don't have to be watching live to create clips. If a streamer has VODs enabled, you can go back through their past broadcasts and clip any moment you want.
- Go to the streamer's channel page and click on "Videos."
- Select a past broadcast or VOD from the list.
- Scrub through the timeline to find the moment you're looking for.
- Click the clip icon (or use Alt+X / Option+X) to open the editor.
- Trim, title, and publish just like a live clip.
This is particularly useful if you're a streamer reviewing your own broadcasts. You can go back after stream, find the best moments, and create clips without relying on anyone else to have caught them live.
How to Manage Your Twitch Clips
Finding Your Clips in the Clip Manager
Twitch has a built-in Clip Manager that lets you see every clip created on your channel (or by you on other channels). To access it:
- Go to your Creator Dashboard on Twitch.
- Navigate to Content and then Clips.
- You'll see a list of all clips, sortable by date, views, and creator.
You can also filter clips by date range, which is helpful when you're looking for your best moments from a specific stream or time period.
Featuring, Editing, and Deleting Clips
From the Clip Manager, you can perform a few key actions:
- Feature a clip: Pins it to a prominent spot on your channel, giving it extra visibility.
- Delete a clip: Removes it permanently. Useful for cleaning up low-quality or unwanted clips.
- Copy the link: Grabs the shareable URL for quick distribution.
Note that you cannot re-edit a clip's trim points after publishing. If you need a different cut, you'll need to create a new clip from the original VOD.
Clip Settings for Streamers (Enable/Disable, Subscriber-Only)
In your Creator Dashboard under Settings > Stream, you'll find the clip controls:
- Enable/Disable Clips: Toggle clip creation on or off for your channel.
- Clip Delay: Add a delay before clips become public (useful for competitive gaming where you don't want opponents seeing your plays immediately).
- Subscriber-Only Clipping: Restrict clip creation to subscribers, giving your paying community an exclusive perk.
For most streamers focused on growth, keeping clips enabled for everyone is the best move. The more clips your community creates, the more potential content you have to distribute.
How to Download Twitch Clips
Downloading your Twitch clips is the first step to turning them into content for other platforms. Here's the simplest method:
- Open the clip you want to download on Twitch.
- Right-click on the video and look for a "Save Video As" or "Download" option (browser-dependent).
- Alternatively, copy the clip URL and use a Twitch clip download tool like Clipr or Twitch Clips Downloader.
- Save the file as an MP4 to your device.
If you're a streamer downloading your own clips, you can also grab them directly from the Clip Manager by clicking the share button and looking for download options.
Once you have the MP4, the real question is: what do you do with it? This is where most streamers stop, and where the biggest growth opportunity begins.
What to Do with Your Twitch Clips (This Is Where Growth Happens)
Why Most Streamers Waste Their Best Clips
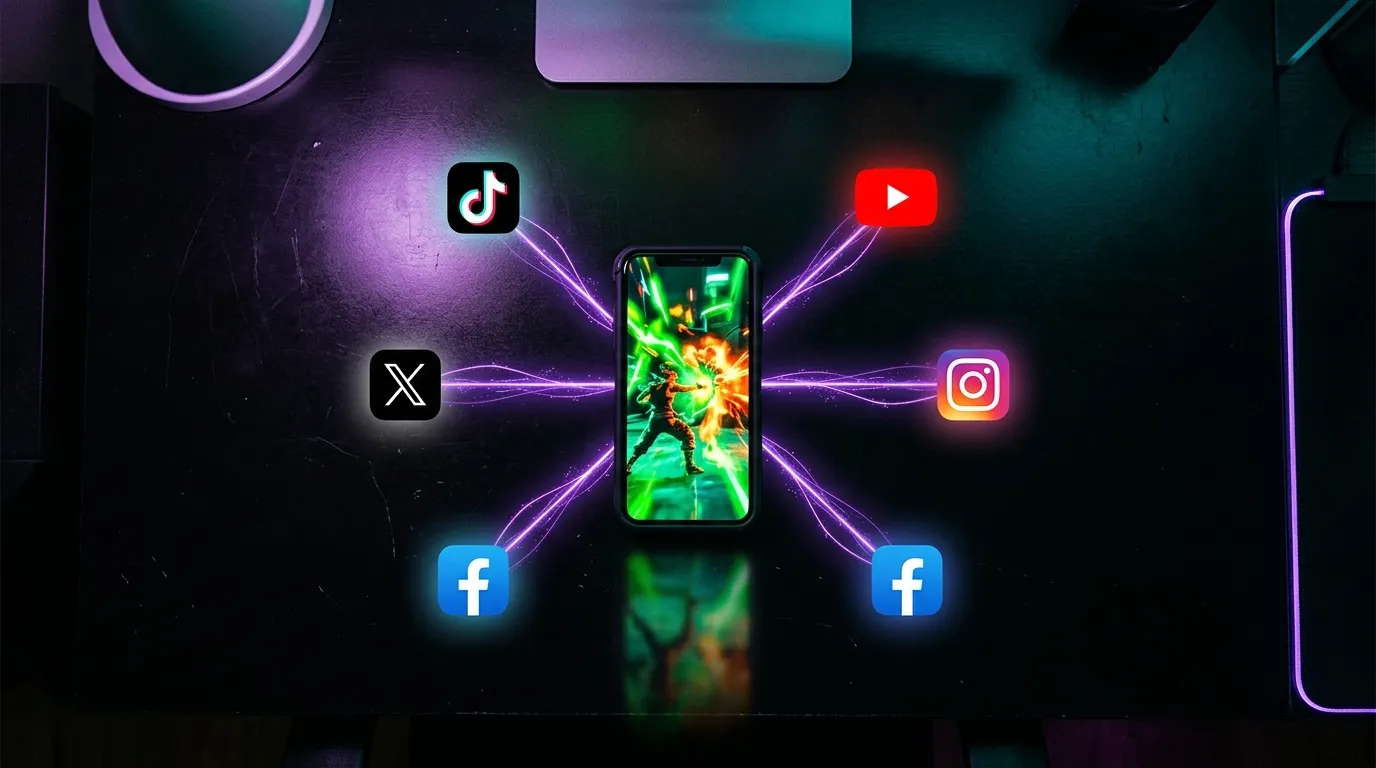
Here's the hard truth: creating a clip and leaving it on Twitch is like recording a great song and keeping it on your hard drive. Nobody is browsing Twitch's clip library to discover new streamers. Your best moments need to go where the audience already is, and that means TikTok, YouTube Shorts, and Instagram Reels.
Short-form video is the number one ROI-driving content format, with 49% of marketers ranking it highest. Video generates 1,200% more shares than text and images combined. Your Twitch clips are already short-form video. They just need to reach the right platforms.
The problem? Most streamers clip something incredible, maybe post it once, then forget about it for weeks. The inconsistency kills momentum. And let's be honest: after a long stream, the last thing you want to do is sit down and edit clips for three different platforms.
Reformatting Clips for TikTok, YouTube Shorts, and Instagram Reels
Twitch clips export in a 16:9 landscape format, but TikTok, YouTube Shorts, and Instagram Reels all perform best in 9:16 vertical. Converting your clips from landscape to portrait is the single most important step in making them platform-ready. This is where a Twitch clip converter becomes essential.
Here's what the reformatting process looks like:
- Crop or reframe the video to 9:16 aspect ratio, keeping the action centred.
- Resize to 1080x1920 pixels for maximum quality on mobile.
- Trim if needed. TikTok and Shorts reward clips under 60 seconds, with the sweet spot around 15 to 30 seconds.
You can do this manually in any video editor, but when you're doing it for every clip across every platform, it eats up hours of your week. Tools that handle this automatically save you serious time.
Adding Captions and Branding to Your Clips
Captions are no longer optional. A massive portion of social media consumption happens with sound off, especially on phones during commutes or breaks. Adding burnt-in captions to your clips makes them accessible and significantly boosts engagement.
Beyond captions, consider adding subtle branding elements like your Twitch handle, a consistent colour accent, or a brief intro card. This builds recognition so that when someone sees your clip on TikTok, they know it's you and can find your stream.
How to Share Twitch Clips on Social Media
The Manual Way (Download, Edit, Upload)
The manual approach to sharing Twitch clips on social media looks something like this:
- Download the clip from Twitch.
- Open it in a video editor (CapCut, Premiere, DaVinci, or similar).
- Crop to 9:16 and add captions.
- Export the file.
- Upload to TikTok with hashtags and a hook.
- Upload to YouTube Shorts with a title and description.
- Upload to Instagram Reels with a caption.
- Repeat for every clip, every stream.
This works. And if you genuinely enjoy editing and posting, it can be a rewarding creative process. But for most streamers, especially those juggling day jobs, school, or parenting alongside their stream schedule, this process falls apart within two weeks. The grind of downloading, editing, and uploading to three or four platforms for every good clip is exactly the kind of repetitive task that kills consistency.
The Automated Way (Set It and Forget It)
This is where automation changes the game. Instead of manually downloading, editing, and uploading each clip, you can use tools that handle the entire pipeline for you. You clip the moment (or your viewers do), and the rest happens automatically.
Streamer Share was built specifically for this. It connects to your Twitch channel, takes your clips, reformats them for every platform, and distributes them on a schedule you set. No editing. No exporting. No logging into five different apps. You stream, you clip, and your content shows up on TikTok, YouTube Shorts, Instagram Reels, and more without you lifting a finger.
Streamers who post short-form clips consistently for six months see an average of 44% more channel growth compared to those who don't. The secret isn't better clips. It's actually showing up consistently.
Clip Farming: How Top Streamers Use Clips as a Growth Engine
What Is Clip Farming?
Clip farming is the practice of intentionally creating and encouraging moments during your stream that are designed to be clipped. Instead of waiting for something random and amazing to happen, you engineer situations that naturally produce shareable content. Think of it as planting seeds during your stream that grow into social media posts afterwards.
Top streamers treat clip farming as a core part of their content strategy, not an afterthought. Every stream session has moments that could become a TikTok, a YouTube Short, or a clip that brings new viewers to the channel.
Creating Clippable Moments on Purpose
You don't need to be a professional entertainer to create clippable moments. Here are some approaches that work across every genre:
- React to unexpected events with genuine emotion. The more expressive, the more clippable.
- Set up challenges or dares from chat. "If I die here, I'll..." is a classic format that creates tension and delivers a payoff.
- Share quick tips or hot takes about your game, your setup, or your niche. Educational clips get shared heavily.
- Tell a brief, punchy story during downtime. Stories that start mid-action and land within 30 seconds are perfect.
- Create recurring segments that viewers anticipate. "The clip of the day" or "best fail of the stream" gives your community something to clip for.
Turning Viewers into Your Clip Team
Your viewers are your biggest asset for clip farming. A single streamer can't catch every great moment while they're focused on gameplay or conversation. But a chatroom full of engaged viewers? They catch everything.
Here's how to build a community of active clippers:
- Acknowledge clippers by name during the stream. "Oh, someone clipped that? Good call." This encourages more.
- Create a channel point reward related to clipping, like "clip that!" where viewers spend points to highlight a moment.
- Review top clips at the end of stream with your chat. This makes clipping feel like a community activity, not a chore.
- Keep clips enabled for everyone. The lower the barrier, the more clips your viewers will create.
When your community handles the clipping, all you need is a system to get those clips out to social media. That's where having an automated pipeline becomes essential.
Best Tools for Twitch Clips in 2026
Twitch's Built-In Clip Editor
Twitch's native clip editor is basic but functional. You can trim clips from 5 to 60 seconds, add a title, and publish instantly. It's free, it's built right into the platform, and it requires zero setup. For quick clip creation, it does the job.
Where it falls short is everything after creation. There's no format conversion, no caption generation, no scheduling, and no cross-platform distribution.
Third-Party Clip Tools (StreamLadder, Cross Clip, Eklipse)
Several third-party Twitch clip tools fill the gap between creation and distribution:
- StreamLadder: A popular clip converter that reformats Twitch clips for vertical platforms. Great for one-off conversions with webcam repositioning and caption overlays.
- Cross Clip: Converts clips to vertical format with templates and auto-captioning. Solid for creators who want quick edits without a full video editor.
- Eklipse: Uses AI to detect highlights in your streams automatically. It can find clippable moments you might have missed, which is great for streamers who don't have an active clipping community.
These tools handle the editing and formatting step well. However, most of them still require you to manually upload the finished clips to each platform yourself. They solve the "convert" problem but not the "distribute consistently" problem.
For a broader look at how these fit into the social media landscape, check out our breakdown of the best social media management tools in 2026 for streamers.
Automated Distribution with Streamer Share
Streamer Share takes a different approach. Instead of just converting or editing clips, it handles the entire distribution pipeline from start to finish. Connect your Twitch channel, and Streamer Share automatically reformats your clips for every major platform, adds captions, and posts them on a schedule you control.
The idea is simple: you focus on streaming, and your best moments reach TikTok, YouTube Shorts, Instagram Reels, and other platforms without any extra work from you. It's built specifically for streamers who know they should be posting clips consistently but don't have the time or energy to do it manually after every stream.
If inconsistency is the thing holding your social presence back (and for most streamers, it is), automated distribution solves that problem at the root. Check out Streamer Share's plans to see which tier fits your workflow.
Frequently Asked Questions
How do you clip the last 30 seconds on Twitch?
Press Alt+X on Windows or Option+X on Mac while watching a stream. This opens the clip editor with the last 30 seconds pre-selected. You can then adjust the selection handles to capture more or less footage before publishing.
Can viewers make clips on Twitch?
Yes, by default any viewer can create clips on any Twitch channel. Streamers can change this in their Creator Dashboard settings by restricting clip creation to subscribers only or disabling clips entirely.
How long can a Twitch clip be?
Twitch clips can be between 5 and 60 seconds long. When you create a clip, Twitch captures up to 90 seconds of recent footage and lets you trim it down to your preferred length within that range.
What is the keyboard shortcut to clip on Twitch?
The keyboard shortcut is Alt+X on Windows and Option+X on Mac. This instantly opens the clip creation editor while you're watching any live stream or VOD on Twitch.
How do I download my Twitch clips?
Open the clip on Twitch, right-click the video, and select "Save Video As" to download it as an MP4. You can also copy the clip URL and paste it into a Twitch clip download tool like Clipr for a direct download link.
What is clip farming?
Clip farming is the practice of intentionally creating moments during your stream that are designed to be clipped and shared. Top streamers use clip farming as a growth strategy by engineering shareable moments, encouraging viewers to clip them, and then distributing those clips across social media platforms.
Key Takeaways
- Creating clips on Twitch is simple. Click the clip icon or press Alt+X (Option+X on Mac) on desktop or mobile to capture 5 to 60 seconds of any stream or VOD.
- Downloading clips is just the starting point. The real value comes from reformatting them for TikTok, YouTube Shorts, and Instagram Reels where new audiences can discover you.
- Consistency beats quality. Posting clips regularly for six months can boost channel growth by 44%. The streamers who grow are the ones who show up on social media consistently.
- Clip farming is a real strategy. Engineer clippable moments during your streams and turn your viewers into your content creation team.
- Automation removes the bottleneck. Tools like Streamer Share handle reformatting and distribution so you can focus on streaming instead of editing and uploading to five different platforms.
- Your clips are already great content. Short-form video generates 1,200% more shares than text and images combined. Stop letting your best moments collect dust on Twitch.